 So many people have e-mailed me to ask where to purchase polymer pocket sticks that I figured I should just explain how to make them. The “koppo” pattern is the one we’ll follow for example here: a stick with a finger loop for two fingers of your hand. You can take any cylindrical object and add a finger loop to it using the koppo wrap, but for this project we’re going to mount the loop with drilled holes.
If you’re just joining us, as they say, a pocket stick is a pressure implement and striking device maybe six inches long (give or take) that can be carried on your person and used for self-defense. You’ve seen these referred to as Yawara and Kubotans, most commonly. “Pocket stick” is the catch-all term I use for these implements. There are pocket sticks on the market of metal and wood, but I’ve not seen too many plastic examples available commercially. In order to make a nice, lightweight polymer pocket stick – which won’t set off metal detectors unless you’re carrying keys and a split ring and which doesn’t suffer from your perspiration over time – all you have to do is obtain some plastic rod from a plastics supply company.
In the past I’ve made pocket sticks from Acetal (Delrin) and Nylon 6/6 MDS. Both of these are relatively soft polymers that can be drilled and carved without difficulty. (Wear respirator protection when working with any plastic material!) You might choose to experiment with other plastics that are more rigid. These are harder to drill and produce more dust, but they give you an even stronger implement when you’re done.
Multi-Craft Plastics in Portland, Oregon and from a local outlet of GE Polymershapes. A half-inch diameter is probably as small as you’d want to go. Three quarters of an inch is probably about as large as you’d want to get. The rest is entirely up to you. The neat thing about making your own pocket stick is that you can configure it to suit you. Length, diameter, placement of the holes… these are entirely your decision and they can be tailored to suit the intended use of your stick. You can choose to mount the finger loop at one or the other end, or in the middle. You are creating a custom item and the options are almost limitless.
The plastic you choose is up to you and I recommend you experiment. One fellow who responded to the first draft of this article prefers Lexan rod, for example. Different plastics are harder or softer and thus the degree of difficulty in working them varies.
For my pocket stick project I chose to create a stick for my loyal minion Kevin, a coworker and friend with whom I’ve been studying Silat. Kevin is, like me, a large white mammal. He had complained more than once about the size of pocket stick samples I’d shown him, pointing out that they were too small relative to his hands. I decided, therefore, to craft a Kevin-sized stick using an extra-large remnant of Nylon 6/6 MDS from a previous project. The exact size and diameter is unimportant because you’ll be sizing your own sticks to suit you.
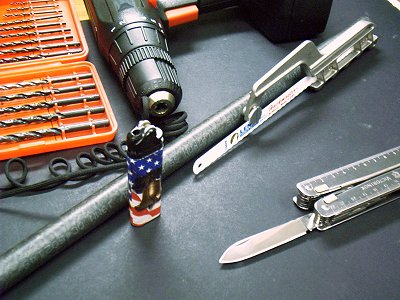
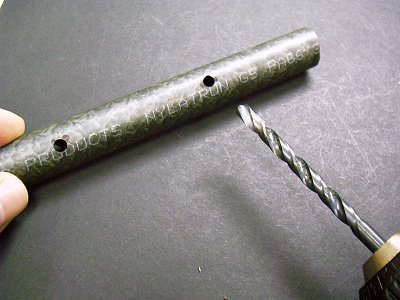
Tools and supplies included drill, lighter, saw, knife, polymer rod, paracord.
First, I assembled my tools. I needed a saw to cut the remnant to size, a knife to cut paracord, a lighter, an electric drill, and the paracord itself. Using my own hand as a reference point and comparing it to Kevin’s, I cut the stick to length. As I said before, when drilling and cutting material like this WEAR RESPIRATORY AND EYE PROTECTION. It’s not good to breathe things like Delrin and Nylon.

Cutting the length of Nylon rod to the size selected.
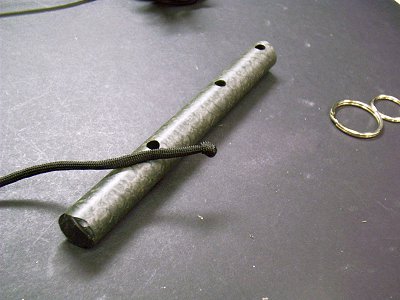
Pocket stick length sized for my loyal minion Kevin.
Once you have the length of rod you want, it’s time to drill holes. What we’re doing is drilling holes to mount a loop for paracord. We’ll be knotting the ends and hopefully concealing the knots within the body of the stick, so you’re making a total of four passes with the drill. The first two passes should be of a diameter just large enough for the paracord. The second two passes are to countersink holes on one side only using a larger drill diameter. You’re going for a cross section that looks something like this:
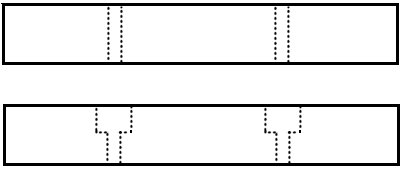
On the first pass (top), drill two small holes big enough for the paracord.
On the second pass (bottom), use a larger drill bit and drill only part of
the way through the smaller holes, creating a larger opening on one side.
Measure the holes, mark them with a Sharpie marker or similar
instrument, and drill all the way through.
Your two smaller holes should be just large enough to fit the paracord
Then select a larger drill bit and countersink holes large enough to fit
the knots you’ll be making in the ends of the paracord..
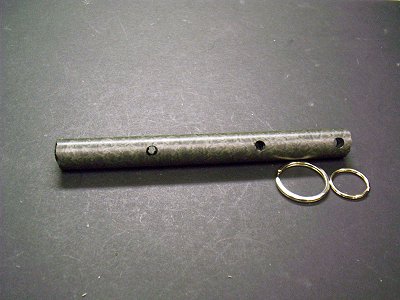
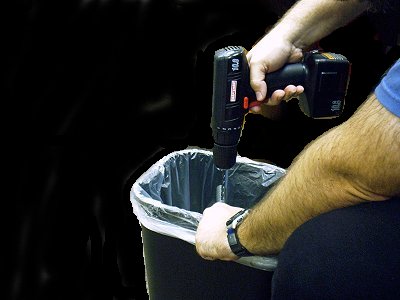
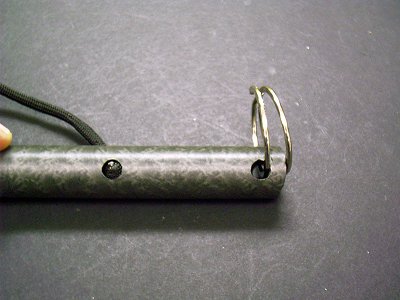
Don’t forget to drill a third small hole in the end of the stick for a split
ring if you intend to use your pocket stick to carry keys.
Drill a third small hole in the end of the pocket stick for a split ring if you want to make this a keychain. Get the hole as close to the end of the stick as you can. The thinner the wall between the hole and the end of the stick, the easier it is to get the split ring on.
Once you have drilled and countersunk the paracord holes, use the awl blade of a Swiss Army Knife or multitool to scrape out any irregular protrusions from inside the holes. Get them as smooth as possible. If you don’t, the plastic shards will tear the paracord when you draw it through.
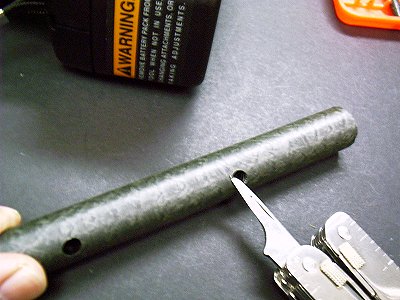
Scrape the paracord holes clean after they’re drilled.
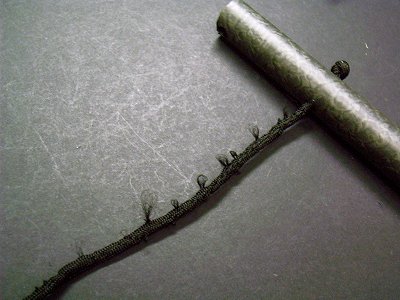
If you miss any shards inside the holes, this is what happens.
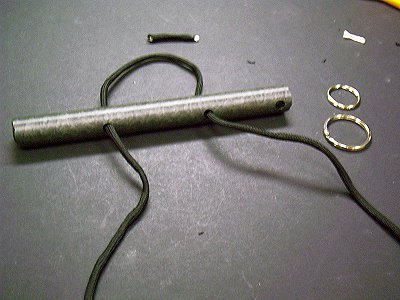
With your holes drilled, countersunk, and smoothed, the construction phase is over. Add your split ring and then get the paracord and lighter, because it’s time to fit the finger loop.
Construction is over. Time to fit the finger loop.
A reader of The Martialist who read the first draft of this article suggested burning uncut paracord to fuse it at the point where you will cut it, then cutting cleanly through the fused portion. This is a very good idea and makes working with paracord a lot easier, because you don’t get the clumping at the ends that sometimes causes the core to come out of the sheathing. Failing this, always burn and twist the ends of the paracord to make it easier to feed the ends through the holes in your stick.
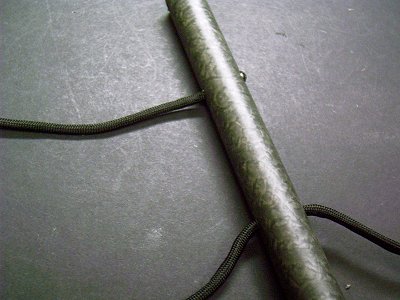
Knot one end and feed the other end of your paracord through one of the enlarged holes on one side of your stick. If you’ve done this right, you’ll be able to see how that enlarged, countersunk hole will contain the knot when we’re finished. Feed the paracord through the other hole, making a loop. DO NOT KNOT THE OTHER END YET. You cannot knot the second end until the loop is sized to your fingers. It’s okay to trim and burn the first knot, though.
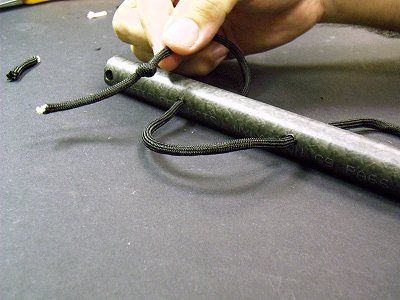
Knot one end of the paracord and feet it through the countersunk side.
Pull the paracord through and make a loop. Don’t knot the second end.
Once trimmed and burned, the knot should fit into the countersunk hole.
The smaller diameter of the paracord hole forms a stop against which
the knot will sit when you pull the loop taut.
It doesn’t matter when you add the split ring and any keys. I would do so about now, but that’s up to you. With the split ring added and the paracord threaded and knotted on one end, all that’s left is sizing the loop to your fingers.
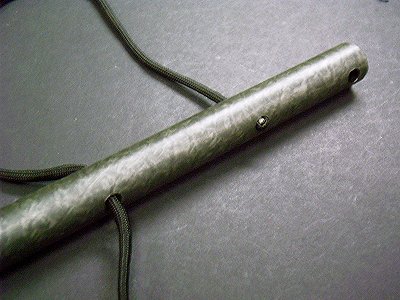
On my sample, I got the hole too far from the end, making it difficult
but not impossible to fit the split ring. Try to drill closer to the end.
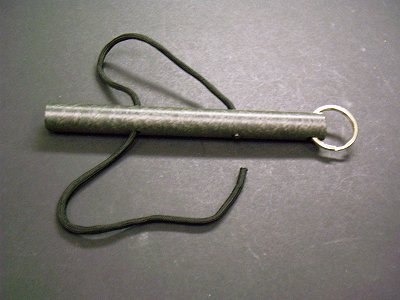
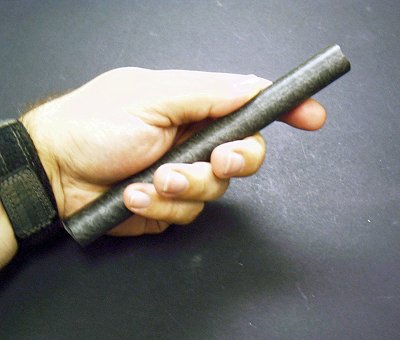
Kevin’s polymer koppo stick, ready for final sizing to his fingers.
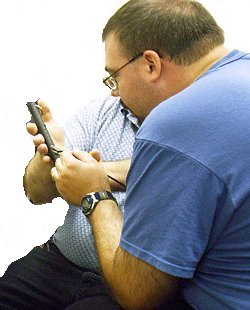
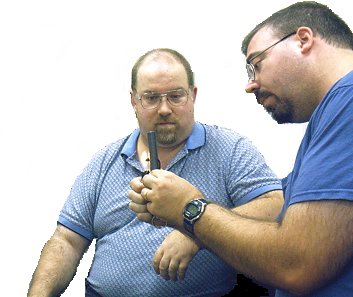
When I reached this stage of the project it was time to go get Kevin. I had him thread the finger loop over his middle fingers so we could tighten it to exactly fit him. If you’re making a stick for yourself, you’ll obviously be doing this on your own hand.
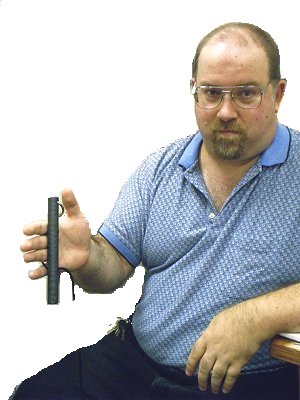
Kevin wears the stick in preparation for sizing.
When you size the cord for your fingers, make it tighter than you think you will need. It will stretch a little when you knot it off. This may take a few tries, so do yourself a favor and don’t knot the cord fully until you’re sure you like it. Once properly knotted, you won’t be able to get it undone. When Kevin was satisfied with the fit of his finger loop, I knotted the cord and trimmed the excess. Then I burned the knot and melted it into a single lump.
Trimming the excess cord.
Melting the second knot to make it permanent.
As long as you have extra paracord you can always cut the old loop free and replace it. That’s the nice thing about a koppo like this. It’s easy to refit the loop if it gets too loose or has gotten grimy with wear.
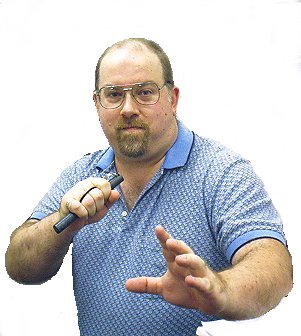
Kevin gets into the spirit of his new tool.
When you’re done, you’ve got your very own polymer pocket stick, perfectly sized to you and configured to your preferences. Project cost isn’t much for materials. Your effort will be determined by your relative skill working with your hands. Personally, I find it very satisfying to make my own self-defense tools. I take a lot more pride in a simple plastic keychain tool I made myself than I do in the latest super-expensive knife or flashlight.
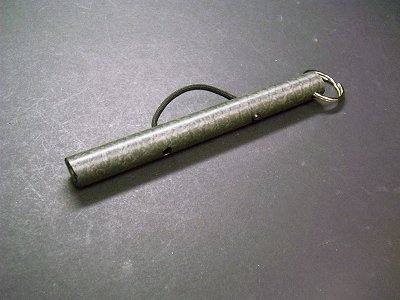
The finished koppo, sized to Kevin’s hand and ready for keys.
With a little experimentation and some practice on the details, you can produce as many of these as you like to whatever specifications you choose.
That’s self-reliant self-defense.
Amazing! Your friend Kevin so strongly resembles yourself, he could be your “stunt double!” Once again, I find your articles instructive, rational, and concise. I owe you a great debt of appreciation Mr. Philmore. I certainly enjoy the idea of empowered individuals crafting and carrying tools for their own defense. Your post makes it easy for beginners to get their feet wet, not just in terms of making a good Lopo stick, but aides one in developing a mindset of self-reliance in matters of personal protection. The Martialist never fails to intrigue and educate.
Thank you, David. All us doughy white guys look alike.