its paid sponsors, whose products you need!

| Home |
| Intro |
| Current Issue |
|
Mailing List |
| Store |
| Strength |
| Subscriber Content |
| ARCHIVES
|
| Martialism |
| Pacifism |
| Q & A |
| Cunning-Hammery |
| Advertise With Us |
| Submit An Article |
| Staff |
| Discussion Forum |
| Links |
“Stay ‘unreasonable.’ If you
don’t like the solutions [available to you], come up with your
own.”
Dan Webre
The Martialist does not
constitute legal advice. It is for ENTERTAINMENT
PURPOSES ONLY.
Copyright © 2003-2004 Phil Elmore, all rights
reserved.
Five Strike Espada y Daga Drill
By Phil Elmore
Working with one long and one short weapon a stick and
a knife, or a long blade with a shorter blade is obviously a little more
difficult than working with a single weapon or two weapons of the same
size. Espada y daga (sword and dagger) training is thus
extremely rewarding and quite a bit of fun. One way to develop
coordination and speed when wielding the sword and dagger is a basic
five-strike drill I learned during Kali training at the
Syracuse Wing
Chun Academy.
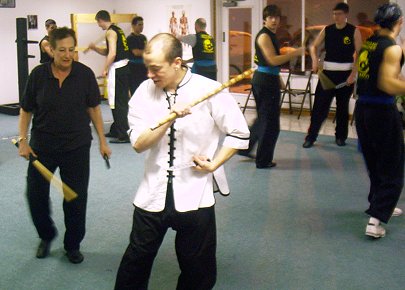
Sifu Anthony Iglesias (foreground) instructs
students in Espada y Daga.
The angle numbers to which I will refer are
based on the 17 Angles previously
described in The Martialist. (Remember that the orientation
is flipped for the left hand, as the angles are illustrated for the right
hand only in the 17-angle pattern drill.)
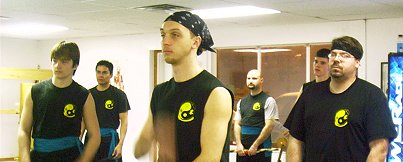
The author (far right) and students observe an
espada y daga drill.
The relatively simple five-strike drill
illustrated here is done from a standing position first, then with basic
forward-and-backward footwork. When students are comfortable with this,
they graduate to circular footwork in which students pivot around an imaginary
point between them. The basic drill is as follows:
WARNING! Knife training is
inherently dangerous. The staff and publisher of The Martialist are
not responsible for any injury that occurs during such training. Use a
safe, dull TRAINING KNIFE only in learning and practicing any pattern drill.
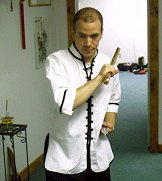 |
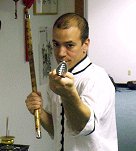
Ready Position
The ready position |
 |
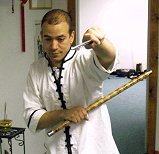
01: Angle Two Witik Strike and Retract
The stick travels in a backhand Angle 2 strike across the opponent’s |
 |
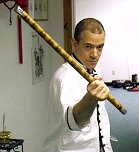
02: Angle 6 Knife Strike to Ready Position
As the stick chambers, the knife arm delivers an Angle 6 strike to the |
 |
03: Angle 4 Strike to Ready (Start)
The stick moves out in an Angle 4 backhand lower across the body. |
 |
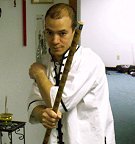
04: Angle 7 Knife Strike and Retract As the stick moves to the right-side |
 |
05: Angle 1 Strike to Ready
As |
 |
Final Ready Position
If |
It should go without saying that the body naturally
twists with the strikes as needed. Integrating footwork with these
movements makes them much more effective. There are three steps in the
final evolution of the drill. Beginning with your right foot forward in
a right front stance…
- Step forward to the side with your left foot while
delivering the first strike and the follow-up knife shot. - Bring your right foot behind your left foot,
cross-stepping as you complete the knife strike and deliver the second stick
strike with its follow-up knife blow. - Step back with your left foot and shift the angle of your
right foot to recover your right front stance, delivering the finishing
fifth strike as you do so.
Performing these steps repeatedly, students move in a circle
around a point forward of their right feet. Two students working
together can circle that point opposite each other. Their sticks meet on
the strick strikes, while the first knife strikes miss each other and the the
second knife strike meets wrist-to-wrist.

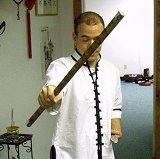
Sifu Iglesias emphasizes proper striking angles.
This may sound complicated, particularly in
text form, but once you’ve got the basic pattern and learn to move the limbs
simultaneously, it comes together nicely. When learned properly the
drill appears very graceful. It is an excellent tool for developing
fluidity while wielding weapons and practicing one’s footwork in conjunction
with striking angles.
You have two arms so put a weapon in
both hands.